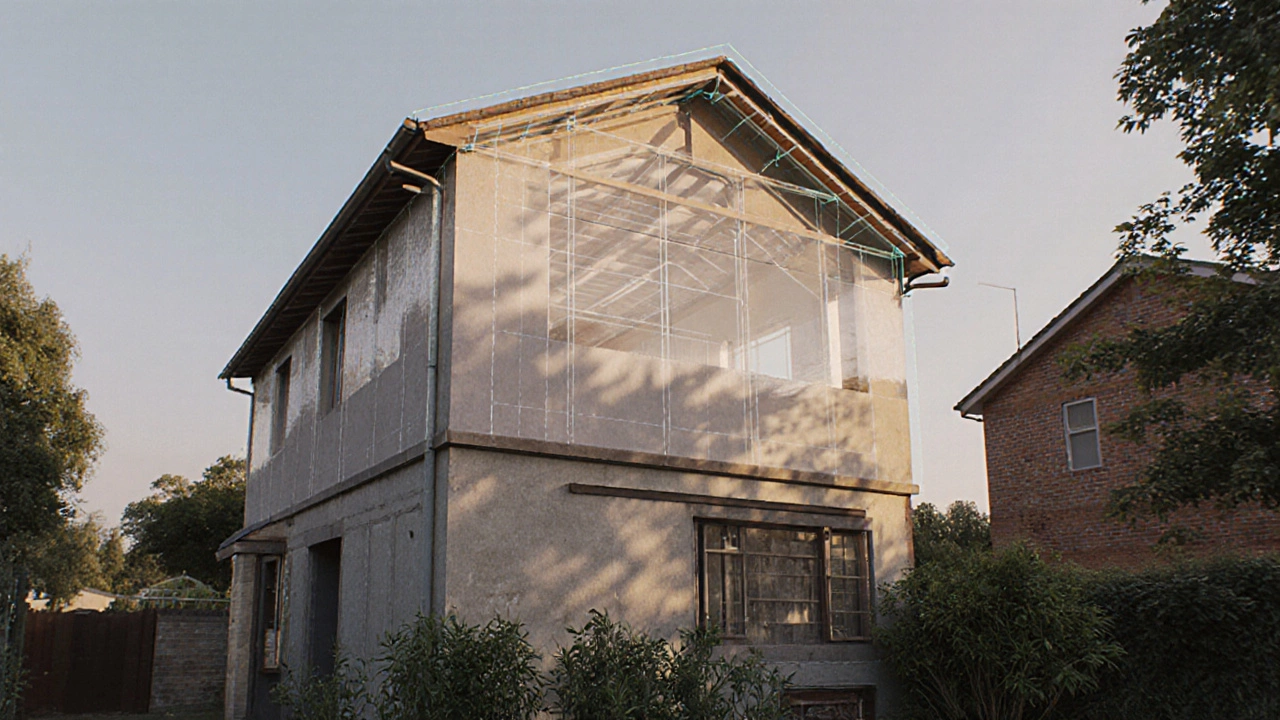
Velux Loft Conversion
When working with Velux loft conversion, adding a roof‑top window and turning the attic into functional living space. Also known as roof window loft remodel, it requires careful planning, proper approvals and the right mix of trades. This process covers everything from structural reinforcement to interior finishes. If you’re planning a Velux loft conversion, you’ll first need to assess whether the roof framing can support the new window and the extra live load of a finished floor. That assessment leads straight into the next semantic triple: a loft conversion requires structural reinforcement, adding beams, joists or new load‑bearing walls to meet safety standards. Without it, the added weight could compromise the roof’s integrity. Once the structure is sound, the focus shifts to bringing daylight inside – a key reason many homeowners choose Velux. Skylight installation, the precise fitting of roof windows with flashing and sealing influences energy performance and leak protection. Proper flashing prevents water ingress, a common pitfall in DIY projects. Finally, the loft’s comfort hinges on loft insulation, high‑R‑value batts or spray foam that keep heat in winter and out in summer. Good insulation improves energy efficiency, reduces heating bills, and makes the new space livable year‑round. All these steps set the stage for the interior design choices that come next.
Key Steps for a Successful Conversion
Step one is a thorough site survey. Measure the roof pitch, the existing joist layout and the clear height under the eaves. A common mistake is assuming any attic can become a bedroom without checking headroom; the building code often mandates a minimum 2.4 m clearance for habitable rooms. Next, bring a structural engineer on board. They’ll calculate the load‑bearing capacity and specify the size of any new beams or steel supports needed for the structural reinforcement mentioned earlier. Their report also feeds into the planning permission application, where you’ll need to show that the new Velux window complies with fire safety and egress requirements. After the paperwork, the actual skylight installation, which involves cutting the roof opening, inserting the window frame and applying waterproof flashing can begin. Contractors often use a temporary roof patch to keep the interior dry during this phase. Once the window sits snugly, sealant and lead flashing are applied to create a watertight barrier. The next phase is loft insulation, typically blown‑in cellulose or rigid foam board placed between joists. Properly installed insulation fills gaps, prevents thermal bridges and meets the U‑value targets set by local regulations. After insulation, you’ll lay the subfloor, which is where flooring options, such as engineered wood, vinyl plank or low‑level carpet, come into play. Your choice here not only affects aesthetics but also durability under foot traffic and humidity. Engineered wood pairs well with the natural light from the Velux, while vinyl offers easy cleaning for a gym‑style loft. Throughout each step, coordinate trades – roofer, carpenter, plumber and electrician – to avoid re‑work and keep the timeline tight.
By the time you reach the finishing touches, the loft will have transformed from a dusty storage area into a bright, functional room that adds real value to your home. The blend of structural work, precise skylight fitting, effective insulation and thoughtful flooring creates a space that feels both spacious and cozy. Below you’ll find a curated collection of articles that dive deeper into each of these elements – from budgeting tips for loft projects and ROI insights on home upgrades, to detailed guides on low‑maintenance flooring and hybrid construction methods that can be applied to loft work. Use these resources to fine‑tune your plan, avoid common pitfalls, and make your Velux loft conversion a smooth, rewarding experience.
 8 Oct 2025
Explore the four main loft conversion types-dormer, hip‑to‑gable, mansard, and Velux-along with costs, planning needs, and tips for choosing the best option for your home.
View More